HomeBusinessElectrical Remodeling Services for Renovation & Upgrade Projects

Electrical Remodeling Services for Renovation & Upgrade Projects

Published on

The Electrical Plan Should Come Before the Paint Samples

Homeowners planning renovations typically spend months on the fun parts — choosing cabinet styles, selecting tile, deciding between quartz and granite, arguing about paint colors. The electrical planning often gets pushed to the end, treated as something that gets figured out once the other decisions are made. This ordering creates problems that are entirely preventable.

Electrical decisions in a renovation affect where outlets end up, how many circuits are available, whether the lighting design is achievable, and whether the appliances chosen will operate correctly on the circuits serving them. Making these decisions at the end of the planning process — after the cabinet layout is finalized, after the appliance selection is made, after the lighting plan is complete — means some of those decisions will need to be reversed or compromised because the electrical infrastructure cannot support them. Making electrical decisions early, as a core part of the design process, avoids that entirely.

What Electrical Remodeling Services Cover

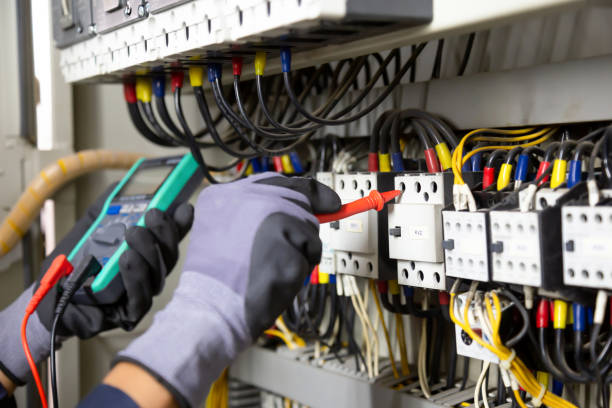
Professional electrical remodeling services begin with a pre-renovation assessment of the existing electrical system — what is there, what condition it is in, and what capacity is available for the remodeled space. This assessment identifies whether the existing panel has room for the additional circuits the renovation will require, whether the wiring serving the renovated areas is in good enough condition to remain in place or needs replacement, and whether any code compliance issues in the existing wiring need to be addressed as part of the renovation project.

From the assessment comes a remodeling electrical plan — a specific layout of every outlet, switch, fixture, and circuit serving the renovated space, designed around the specific requirements of the project. This plan coordinates with the overall renovation design to ensure that electrical components end up where they are actually needed rather than where they happen to be convenient to install.

Kitchen Remodel Electrical: The Most Demanding Renovation Space

A code-compliant kitchen remodel electrical plan includes dedicated 20-amp circuits for the refrigerator and dishwasher, at least two 20-amp small appliance circuits serving countertop outlets on the countertop areas, a dedicated circuit for the microwave, a properly rated range or cooktop circuit — 50-amp for most full-size electric ranges — adequate lighting circuits designed around the specific lighting plan chosen, and AFCI protection on all bedroom circuits as required in the current code cycle.

This is considerably more circuit capacity than most older kitchens have. Adding these circuits to an existing panel requires available breaker slots and adequate service capacity — both of which need to be verified before the remodeling plan is finalized. When the existing panel cannot accommodate the additional kitchen circuits, the kitchen remodel and a panel upgrade become linked projects that need to be planned and budgeted together.

Bathroom Remodel Electrical: Moisture, Code, and Proper Placement

Bathroom electrical remodels involve a set of requirements that are more specific than most other rooms in the house. All outlets in bathrooms must be GFCI protected, by code, regardless of how far they are from the water source. Exhaust fans — which are required in bathrooms without operable windows in current construction — need properly rated circuits and in many cases benefit from upgrading to combination fan-light-heater units that require their own dedicated circuits.

Light fixture placement in bathrooms is governed by code requirements that specify minimum distances from tub and shower enclosures for fixtures that are not specifically rated for wet locations. Getting this placement right requires knowing the code requirements — not just eyeballing it — and specifying fixtures that are properly rated for their actual location. This is the kind of detail that experienced remodeling electricians handle without needing to be prompted.

Whole-Home Renovation Electrical Coordination

Whole-home renovations involve electrical work that spans every room and often includes the panel and service entrance. Managing this scope requires careful scheduling — rough-in electrical work happens before insulation and drywall, trim-out electrical work happens after painting is done. Getting these sequences right in coordination with the general contractor and other trades requires communication and planning that experienced remodeling electricians handle as a normal part of their workflow.

Whole-home renovations are also the ideal opportunity to address the cumulative deferred maintenance that older homes accumulate in their electrical systems — replacing outdated wiring, adding missing GFCI and AFCI protection, upgrading the panel, and adding circuits that the original installation never included. Doing this electrical upgrade work while the walls are open for a general renovation is far more efficient and less disruptive than doing it as a standalone project with finished walls.

Office Renovation Electrical: Power, Data, and AV Infrastructure

Office renovation projects in commercial and mixed-use buildings in Southaven increasingly involve more than traditional power wiring. Data infrastructure — structured cabling for high-speed network connections, power over Ethernet for IP phones and wireless access points, dedicated circuits for network equipment — needs to be planned and installed alongside or in advance of the finish work.

Conference room and collaborative workspace electrical planning involves dedicated circuits for AV equipment, in-floor or in-wall power and data pathways for flexible workspace configurations, and lighting control systems that support videoconferencing requirements. These installations require coordination between the electrical contractor, the AV integrator, and the IT infrastructure team — coordination that works best when all parties are engaged early in the planning process rather than trying to coordinate around each other’s already-finished work.

Latest articles

Shower Screen Installation: 7 Mistakes to Avoid in Your Bathroom

A new shower screen can make your bathroom look cleaner, brighter and more modern....

Car Wreckers Perth: How Heavy Tow Trucks Extract Vehicles from Tight WA Carports

Arranging to sell an inoperable, written-off, or unregistered car to an auto recycler is usually a straightforward decision. However, for thousands of property owners across Western Australia, an immediate logistical obstacle creates hesitation: the physical location of the dead car. Suburban living across the Perth metropolitan area features unique architectural layouts. From 1970s villas in Tuart Hill and narrow laneway townhouses in Subiaco to battle-axe rear blocks in Morley and modern subdivided properties across Baldivis, carports and driveways are often exceptionally tight. It is common for a scrap vehicle to sit wedged deep inside a low-clearance brick carport, parked nose-first against a garden wall, sunken on four flat tyres, or immobilized with a seized transmission and steering lock engaged. Vehicle owners often worry: How can a massive commercial recovery truck possibly extract a non-running car without scraping brick pillars, cracking exposed aggregate concrete, or clipping the gutters? As an established, fully licensed Car Wrecker Perth specialist, WA AUTO PARTS manages complex vehicle recoveries every day. Modern vehicle extraction does not rely on brute force; it requires specialized low-clearance equipment, mechanical rigging physics, and experienced operators. Below is an inside look at how professional auto recyclers safely extract non-running vehicles from Perth’s tightest carports without property damage. 1. The Challenges of Tight WA Carport Extractions Extracting a vehicle with a running engine and functional power steering is simple. Extracting a dead, immobilized car from an enclosed carport presents multiple physical hurdles: Low Overhead Clearance: Many older Perth carports, timber pergolas, and multi-unit basement garages have vertical height limits between 1.9 and 2.2 meters. A full-sized tilt-tray recovery truck cannot physically drive under these structures. Seized Drivelines and Broken Steering Locks: If a car has been stationary for months or years, the brake calipers often rust solid to the brake discs. Furthermore, missing ignition keys mean the steering wheel is permanently locked at an angle. Sharp 90-Degree Access Angles: Modern suburban infill developments often feature battle-axe driveways with tight right-angle turns, narrow brick boundaries, and low overhangs from neighboring trees. Delicate Ground Surfaces: Western Australian homes frequently feature decorative exposed aggregate, custom paving, or fragile limestone retaining walls that can crack under excessive axle weight or uncontrolled metal drag. 2. Specialized Rigging Gear: The Extraction Toolkit When you book vehicle removal with a premier Car Wrecker Perth operator like WA AUTO PARTS, our tilt-tray tow trucks arrive equipped with specialized extraction tools designed to negotiate tight spaces:  ➔  ➔    GoJak Wheel Dollies and Heavy-Duty Skates If a vehicle has seized brakes, flat tyres, or a locked transmission in "Park", dragging it across concrete causes rubber scuffing and high mechanical resistance. Technicians use mechanical ratcheting dollies (such as GoJaks) that slide around each tyre. Pumping the foot pedal lifts the tyre cleanly off the concrete. With all four wheels resting on 360-degree ball-bearing casters, an operator can physically spin a 1.8-tonne sedan sideways or guide it around brick carport pillars with minimal effort. Snatch Blocks and Directional Pulleys When a recovery truck cannot align straight with the carport opening, pulling the cable directly from the truck's winch could drag the vehicle into a structural pillar. Operators utilize heavy-duty snatch blocks (directional pulleys) anchored to temporary load-rated points or dead-man anchors. By running high-tensile synthetic winch lines through these pulleys, operators redirect the pulling force around corners, guiding the car smoothly out of the carport along a curved path. Low-Approach Angle Tilt-Trays Once the car is safely guided out onto the wider driveway or street, our hydraulic tilt-tray beds slide backward and drop down to create an ultra-low loading angle (typically 8 to 10 degrees). This low approach ensures lowered front bumpers, exhaust systems, and underbody components slide onto the truck deck without scraping. 3. Step-by-Step: The Professional Extraction Workflow Professional vehicle recovery is executed methodically to ensure absolute safety for your home and surrounding structures. Here is how our team at WA AUTO PARTS extracts an immobilized car from a tight space: Stage Operational Action Primary Safety Objective 1. Site Survey Technician assesses roof height, pillar clearance, and ground slope. Determines whether dollies, snatch blocks, or direct winch pull is required. 2. Mobilization Tyre skates or dollies are fitted to non-rolling or locked wheels. Prevents surface damage to decorative paving, tiles, or driveway aggregate. 3. Clearance Check Wing mirrors are folded in; path is cleared of bins and garden hoses. Maximizes lateral clearance between brick pillars and boundary fences. 4. Controlled Extraction Winch or manual maneuvering guides vehicle into open driveway space. Eliminates structural impact risks and maintains steady tension. 5. Bed Loading Vehicle is winched onto the hydraulic tilt-tray and chained at four points. Complies fully with National Transport Commission load restraint standards. 4. How Homeowners Can Prepare for a Seamless Extraction While our recovery drivers are trained to handle challenging extractions, property owners can take a few simple steps prior to the truck’s arrival to ensure a smooth, rapid pickup: Clear the Driveway Corridor: Move daily-driven family cars, trailers, wheelie bins, and children's bicycles out onto the street. Creating a straight, unobstructed path saves valuable time. Locate Keys (If Available): Even if the battery is completely dead, having the physical key allows our driver to unlock the steering column and shift the transmission into Neutral, speeding up the extraction. (If keys are lost, notify us beforehand so we bring dedicated wheel dollies). Trim Overhanging Foliage: If low tree branches or overgrown bushes line the narrow side of your carport, trimming them back prevents paint scuffs on your boundary and gives the driver clear visibility. Ensure Easy Gate Access: If the vehicle sits behind side gates or a security barrier, ensure gates are latched fully open and locks are cleared. 5. Why You Should Never Attempt DIY Extraction When faced with a vehicle stuck in a tight garage or carport, some owners attempt to extract it themselves using a neighbor’s 4WD, a tow strap, or a hardware store come-along winch. Attempting DIY extraction on an immobilized vehicle in an enclosed space carries severe risks: ...

SEO Beyond Google: Optimising Content for ChatGPT and AI Search

For most of the history of search marketing, the objective was easy to describe....

Guide to Cannabis Pre-Rolls in Bronxville

For cannabis consumers seeking convenience without sacrificing quality, ready-to-smoke products have revolutionized the modern...

More like this

SEO Beyond Google: Optimising Content for ChatGPT and AI Search

For most of the history of search marketing, the objective was easy to describe....

Gravel For Sale: How to Choose Between Crusher Run, #57, and #78 Stone

Gravel names can sound interchangeable until a project depends on the way each material...

The Ultimate Pre-Offer Inspection Checklist for Townhomes for Sale

Smart buyers do more than admire finishes before making an offer. A careful pre-offer...